Copy the LUTs to DaVinci Resolve’s LUT Folder
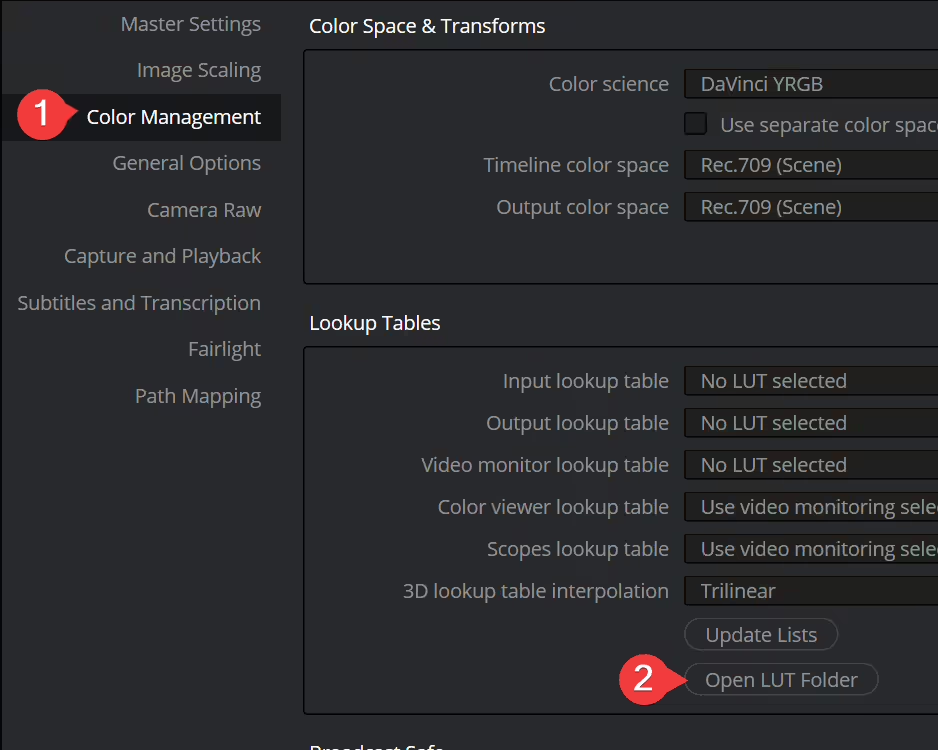
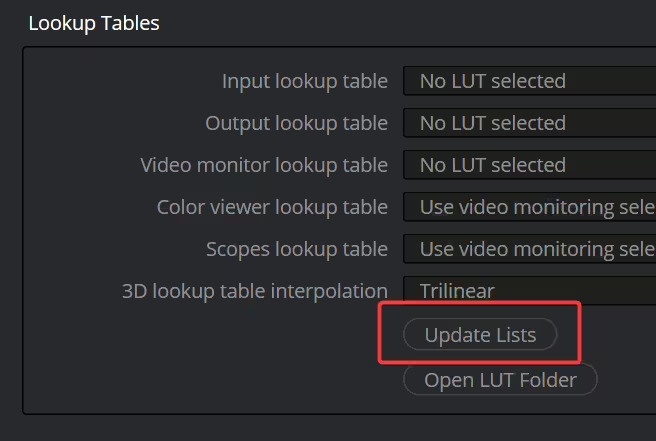
Go to File > Project Settings > Color Management. Under the “Lookup Tables” section, click on the “Open LUT Folder” button.
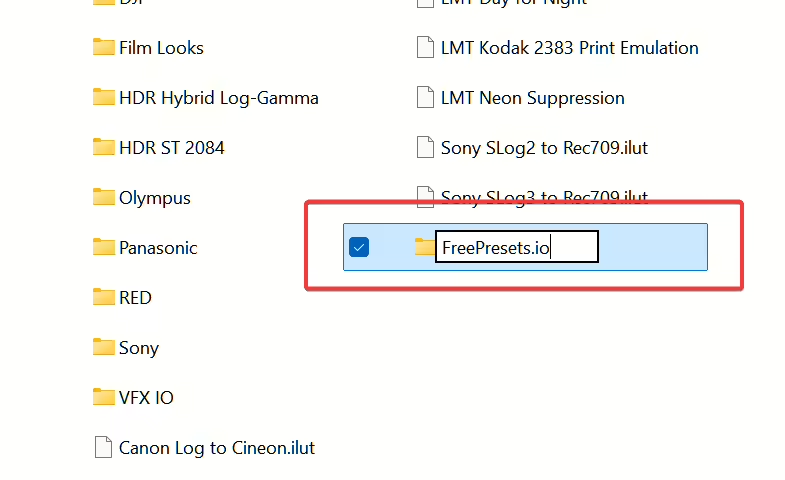
Create a folder named “FreePresets.io”. Go into the newly created folder and copy the *.cube files from the download.
Update the LUT Lists
Go back to the Project Settings window in DaVinci Resolve and click the “Update Lists” button then click the “Save” button.
Add an Adjustment Clip
Create an adjustment clip. LUTs added to an adjustment clip work on all clips below it, which is easier and keeps things more organized compared to adding it to each clip one by one.
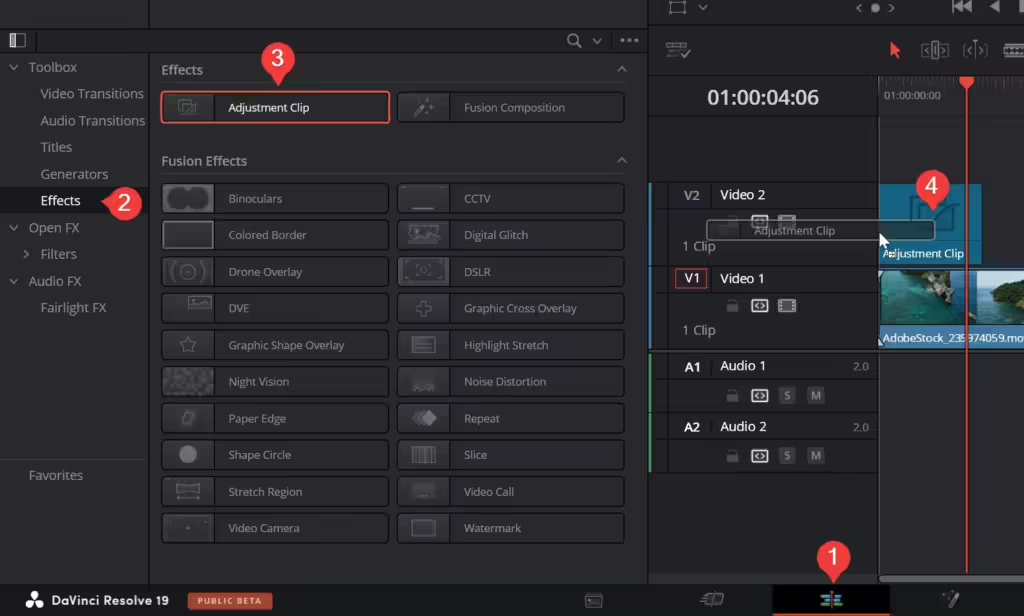
- At the bottom of DaVinci Resolve, click on the “Edit” tab.
- In the “Effects” area, go to Toolbox > Effects.
- Find the “Adjustment Clip” under “Effects”.
- Drag it onto a track above your video clips in the timeline. Stretch the clip to cover the clips below it.
Apply a LUT to the Adjustment Clip
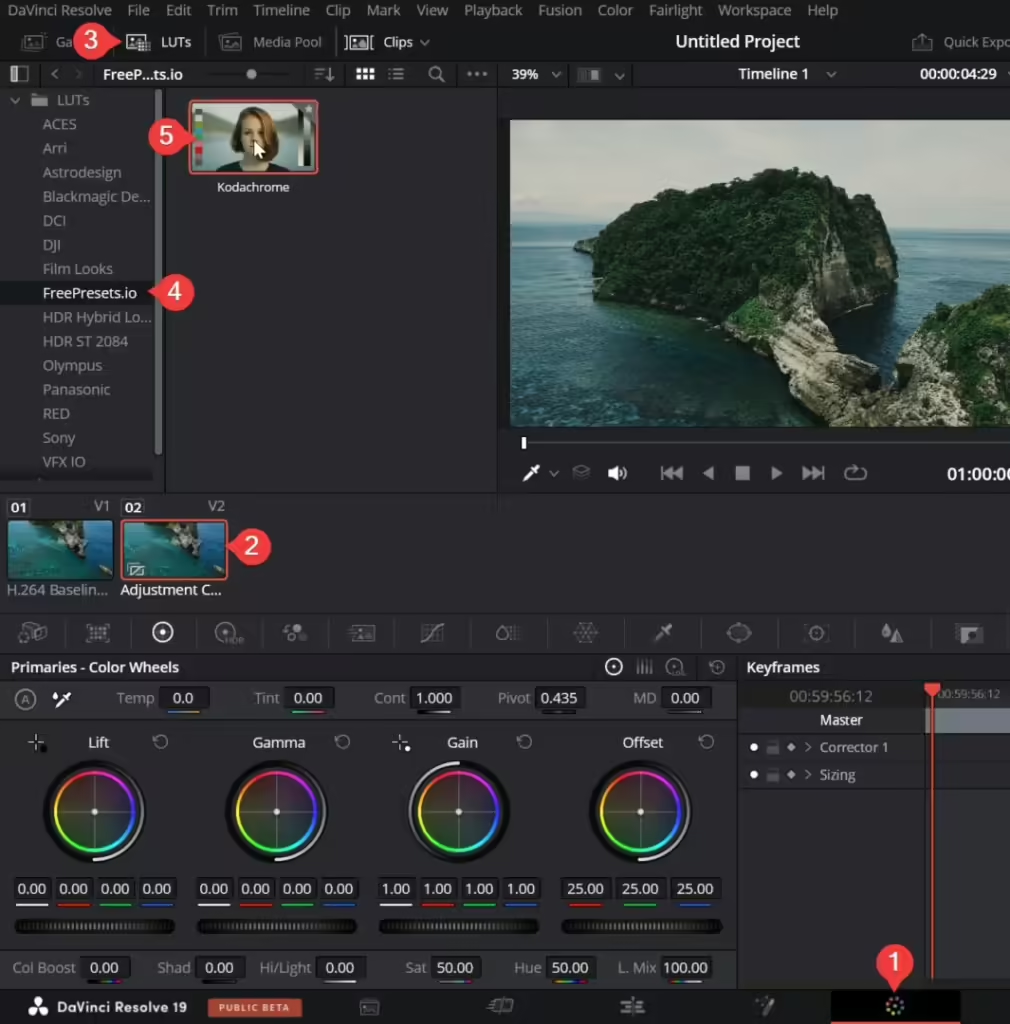
Now that you have an adjustment clip, you can apply a LUT to it in the Color page.
- Go to the Color page.
- Click on the Adjustment Clip.
- Open the LUTs panel.
- Navigate to the LUTs > FreePresets.io folder.
- Select a LUT.
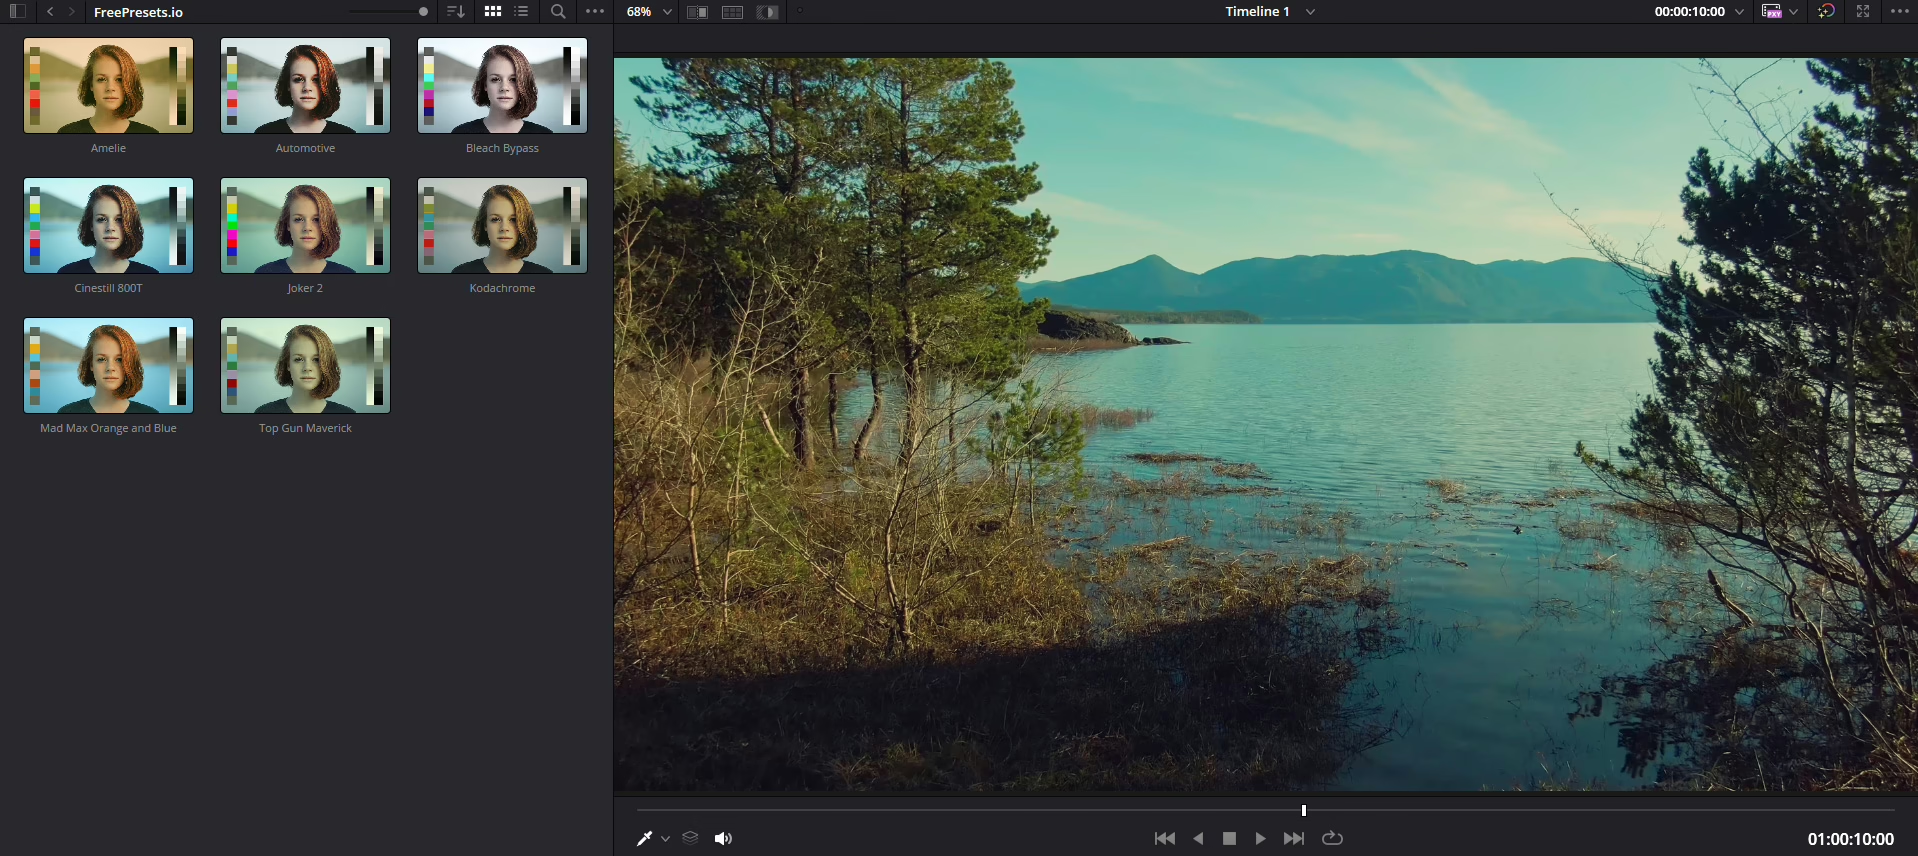
Your LUT should now be applied to your adjustment clip.
